Although printing quality is not the best, the manual was very helpful in order to reactivate this ancient but still good electronic musical instrument.
as a first-time user and buyer from this site, i found the overall service outstanding!! this product is a godsend as, without it, i would never have been able to find my way around and use my machine as intended. i will certainly use this site again as required. many many thanx!!
Text excerpt from page 4 (click to view)
Connecting the oven to the power supply
_ Make sure that the voltage indicated on the rating plate is the same as the mains voltage. The rating plate is on the front edge of the oven (visible when the door is open). _ If the power cable is not present proceed as follows: 1. Remove the two fastening screws of the terminal box cover located on the bottom part of the oven's rear covering. 2. Remove the cover to gain access to the terminal box and insert the power cable (see table) through the opening located on the bottom of the oven.
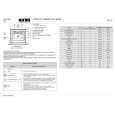
Power supply cable table N° of conductors 1N+ Type of cable H05 RR-F 3 X 1.5 mm²
~
3. Connect the cable to the terminal box, tighten the screws as far as they will go and secure it to the cable fastener. 4. Put the cover back on by inserting the two blades in the slots and fasten it with the two screws.
Securing the oven
_ Lift up the oven getting hold of it by the handles (B) on the sides and insert it into the housing unit, being careful not to trap the power supply cable (fig. 8). _ Center the oven in the housing unit before securing it. _ The oven comes with spacers already fitted to facilitate the anchoring of the oven to the housing unit with the screws provided (as shown in fig. 9).